Photoshop, Final Cut, Motion, After Effects, ZBrush (including ZBrush ‘Z’ logo), Cinema 4D, Bryce, Maya, 3DS Max, Vue, Carrara, Lightwave are Trademarks and/or Registered Trademarks of their respective companies and/or publishers.


Prev - Next
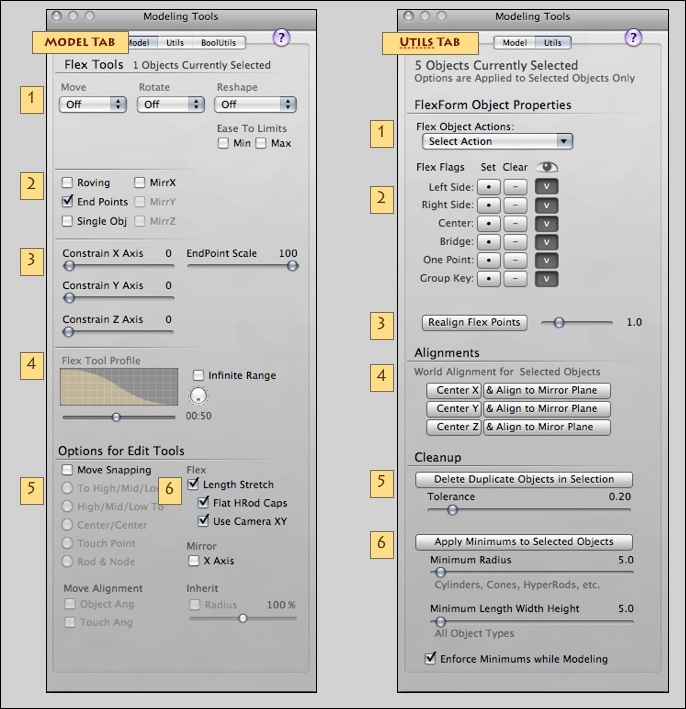
Modeling Tools - Model Tab
1. Flex Tools - Move, Rotate, Reshape Pop-Ups
Activates the Flex Options of the standard Move, Rotate, and Reshape tools found in the Edit Panel below the GroBoto Workspace. These are options are only in effect when the tool is applied in the Workspace (that is, when you click & drag on objects in the workspace with one of those tools selected in the Edit Panel).
2 . Flex Tool Options
Set behavior options for all Flex Tools.
3 . Constraints & Endpoint Scale
Constraints limit the ‘pull’ of the flex tool in the specified direction. EndPoint scale shrinks the location of the Flex Control Points away from the ends of primitives, and towards their centers.
4 . Flex Tool Profile
Sets the ‘falloff’ of the Flex tools - how far the tools influence extends, and how concentrated the effect is near the center of the tool.
5 . Options For Edit Tools
These replace and/or extend the version 2 snapping options for the Move Tools. These tools are difficult to describe with text, but very simple to understand when seen in use so...
6 . Flex - Shortcuts for the special Single Object Flex Option
These controls provide easy access to of the Flex Tools most useful features - Stretching a Single Object with a Fixed Endpoint (works with Cones, Cylinders, HyperRods, Ellipsoids and Cylinders).
These checkboxes duplicate the functionality you would get from a certain combination of the full Flex Tool options (with many fewer clicks - and without entering the Flex Tool mode).
This option is especially powerful when used with the new snapping options. Again, the Videos are the best place to learn about this tool.
6. Flat HRod Caps - Forces the end caps of HyperRod objects to become and remain flat. This is essential when using Flex, otherwise the caps tend to elongate in a distracting, un-useful way..
6. Use Cam XY Checkbox - Overrides the Tool palette Move Tool coordinate settings when using the Flex Option (so that it always uses Camera XY).
Modeling Tools - Utils Tab
1. & 2. FlexForm Object Properties
These tools tag selected objects with identifiers that allow Flex Tools to operate more intelligently... not required but recommended.
3 . Realign Flex Points
Realigns matching points in ‘FlexForm’ structures. Flex Tools take advantage of primitives with matching end and/or center points. These points can drift apart during editing due to tiny errors - this button attempts to realign those objects.
4 . World Alignments
Handy for centering (and optionally aligning) objects to the Mirror Plane. Centers only in the selected direction (as opposed to our ‘Send Object Home’ context menu which sets the location to 0,0,0).
5. Cleanup - Delete Duplicates
Absolutely coincident primitives (matching primitive type, location, rotation, and sizes), are created by certain Bots, and can occur when using Snap options. Our Mesh generation tolerates duplicates quite well, but it’s a good idea to eliminate them (makes object editing easier/less confusing, speeds mesh generation, etc.) This tool can also be used to simplify dense arrangements of objects (using higher tolerances).
6 . Cleanup - Minimum Sizes
Increases dimensions of very thin/small objects. If the ‘Enforce Minimums while Modeling’ box is checked, it limits the size while resizing with Flex Reshape.
Model Tab
The items in the upper portion of the Model Tab all relate to the new Flex Tools (advanced options for Moving, Rotating & Reshaping).
The ‘Options for Edit Tools’ in the lower portion of the Model Tab can be used with or with out the Flex Tool options. They are simply an expansion of the snapping & matching options we have in version 2.
Utils Tab
Note that most of the items in this Tab work on selected objects only. They will be disabled if nothing is selected in the workspace.
The upper portion relates to FlexTools, everything else is general-purpose.
Cam XY Checkbox - Overrides the Tool palette Move Tool coordinate settings when using the Move FlexTool (so that it always uses Camera XY).
Rod & Node Radio Button (Move Snapping) - Automates snapping options, especially useful for building ‘FlexForm’ structures. Distinguishes Spheres from other primitive types. Snapping always uses the Sphere’s center, while using the ends of other object types.
Flex Properties Visibility Buttons - Toggles visibility of Flex Properties wireframes (That is, the visibility of the colored wireframe indicators that are displayed if you select ‘Flex Property Wires’ with the workspace Context Menu -- does not affect visibility of the objects themselves).
Flex Property Group Key Button - Sets or clears the ‘Group Key’ Property of any selected objects. The Key Object of any GroBoto Group directly controls the location and orientation of any other objects in that same group. The Key Object in the ‘Parent’ and all other objects in the same group are it’s ‘Children’.
Mac Page
Click icon to switch to Windows


See the Videos In particular, these two: Freestyle Character Modeling • New Modeling Tools-9a
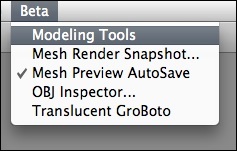
New Modeling Tools Panel
The ‘Modeling Tools’ item in the ‘Beta’ menu opens this new Panel. The Panel has two tabs: ‘Model’, and ‘Utils’.
Important Note: Automatic Object Space Override.
The Object Space Coordinates are always used when Moving or Rotating any object (or selection of objects) by clicking on and dragging an object within the workspace - overriding whatever coordinate space is selected in the Edit Panel. If you click the Controls in the Edit Panel, or the background portions of the workspace, the Edit Panel coordinate setting will be used.
We have made this the default behavior because Object Space Coordinates are very useful. They provide a visually intuitive way of moving & rotating objects. When combined with locked selections, it means you can use any object in the scene as a guide for movement direction and rotation axis. The videos linked above show some examples of these options at work. More videos coming soon.